This type of article in 2025 ? (let me add 2025+)..Yes. You’d bet the amount of questions people ask chatgpt every day, you’d be suprised.
No DevOps shaming, lets automate deployment of a laravel app via github action using your shared hosting (cpanel) ssh credentials.
Automated deployment to shared hosting (cpanel) via github action is popular but this process written here is not. I mean, if using the ftp/ftps github action doesn’t work for you, I promise you that the approach I penned down here is more realiable in my opinion. Lets get into it
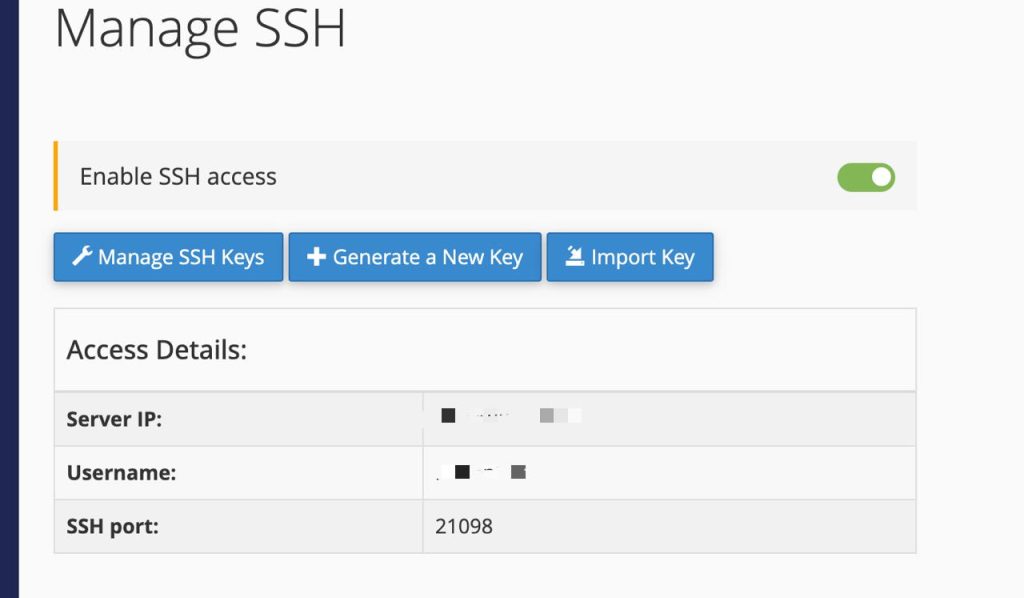
First, you want to allow ssh access. In the cpanel dashboard, search for “Manage shell”. Once you find that, next thing you want to do is “Enable SSH Access”
NB: Worthy of note is that, if you don’t seem to see any of the buttons to click, you want to contact your host support to enable it for you from their end. Please take note of your server ip and username, we will need it in the upcoming steps.
Generate SSH keys
We want to generate an ssh key in order to allow our github action (i.e our automation tool) be able to connect with our server when it tries to automate deployment.
Open your terminal and run the following command to create the necessary ssh keys. ssh-keygen -t rsa -b 4096 -C "github-deploy"
You will be prompted to enter a file to save the key,
Something like: Enter file in which to save the key (/home/yourname/.ssh/id_rsa):
(Please take note of the path, it should be your own path as this is just an example).
Please specifiy the github-deploy as your ssh key file name./home/yourname/.ssh/github_deploy
The process will ask for a paraphrase, just ignore then press ENTER two times.
This will create ssh keys: A public and a private key.
Lets update cpanel with the public keys. To see the public keys, run the following command:
cat ~/.ssh/github_deploy.pub
This will bring an output like :
ssh-rsa AAAAB ablablblbalblaa-lenthgy-blab/= github-deploy
Now, copy this key, navigate to your cpanel, search for “Manage SSH”, then click on “import key”. You should see fields to fill like so:
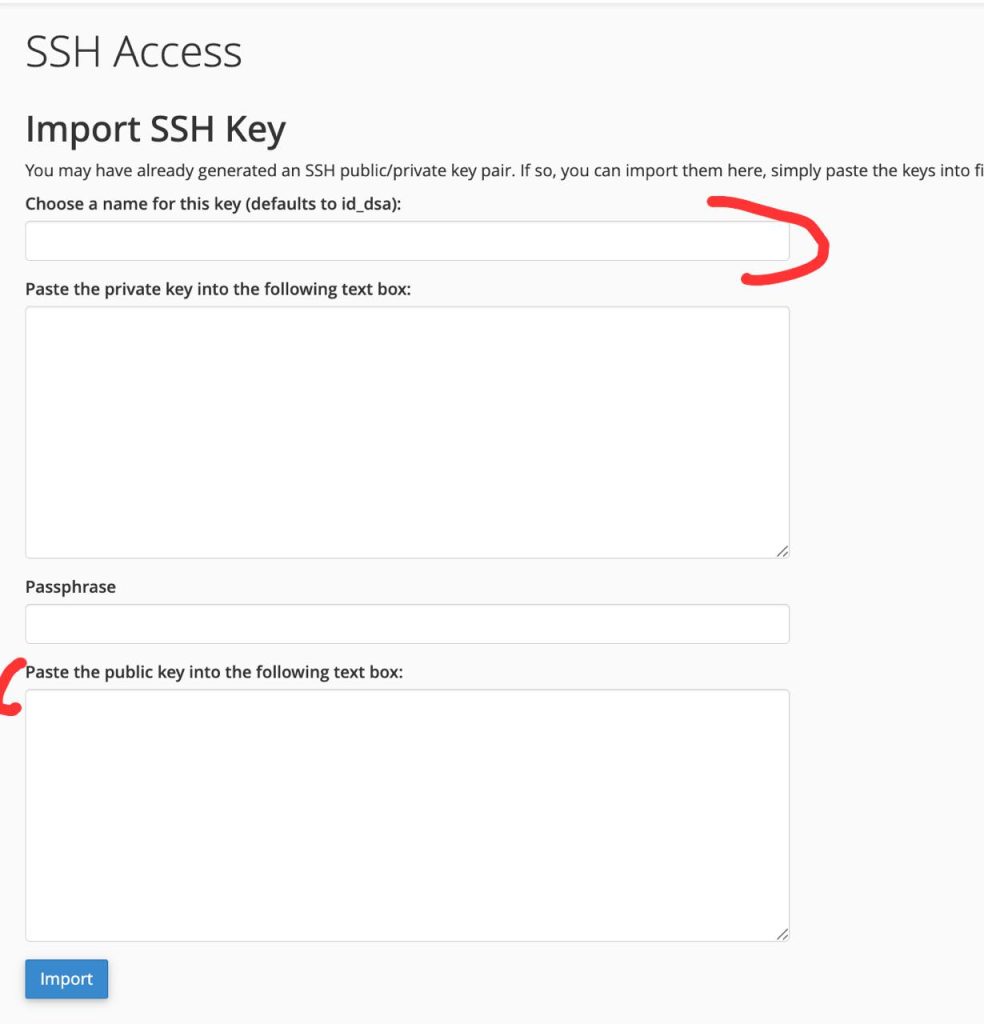
Choose a name for your key. Let’s use “github deploy”–but use a key name that is not existing before.
NB:I use em dashes pre AI. Just saying.
Paste the public key we generated then click “import”.
Check out this article:
Media uploads to Azure blob storage: the REST API Way in Laravel/PHP.
Authorized SSH KEY
After clikcing on import, you should be prompted to go to the page that has your newly imported ssh key which is the ‘manage ssh’ page. In the manage ssh section, you want to authorized your ssh key. It defauls to “unauthorized” when you create a new key.

Next, click on “manage”, it takes you to a page, please click on the “authorize” button.
GITHUB ACTION YAML SCRIPT SETUP
Now we have that checked, lets setup our github action script.
name: Laravel CI/CD
on:
 push:

branches: [main]

pull_request:

branches: [main]

jobs:

deploy:

runs-on: ubuntu-latest

steps:

- name: 🧾 Checkout code

uses: actions/checkout@v2

- name: ⚙️ Setup PHP

uses: shivammathur/setup-php@v2

with:

php-version: "8.2"

- name: 📦 Install PHP dependencies

run: composer install --prefer-dist --no-progress --no-scripts --no-dev

# Optional: Build frontend assets if needed

# - name: 🛠️ Build assets

# run: npm install && npm run build

- name: 📂 Deploy via SSH and rsync

env:

SSH_PRIVATE_KEY: ${{ secrets.SSH_PRIVATE_KEY }}

run: |

mkdir -p ~/.ssh

echo "$SSH_PRIVATE_KEY" > ~/.ssh/id_rsa

chmod 600 ~/.ssh/id_rsa

ssh-keyscan -p 21098 cpanelserver.com >> ~/.ssh/known_hosts

rsync -avz -e "ssh -p 21098" \

--exclude=".git*" \

--exclude="node_modules" \

--exclude="vendor" \

./ cpanelUsername@cpanelserver.com:/home/username/public_html/

This is a typical template that you want to use. The details shouldn't bother you that much except for the commented

ssh-keyscan -p 21098 yourcpanelserverurl.com >> ~/.ssh/known_hosts
e.g on namecheap, it will look like this:
ssh-keyscan -p 21098 server243.web-hosting.com >> ~/.ssh/known_hosts

Next is the last line,

./ cpanelUsername@yourcpanelserverurl.com:/home/username/public_html/

what you want to use is your cpanel username referecing your server then the path tto where your project is.
E.g on namecheap, it will look like this:

 ./ cpanelUsername@server243.web-hosting.com:/home/cpanelUsername/public_html/.
If the project folder is in a subdomain, you should point the path to the subdomain folder.

 ./ cpanelUsername@server243.web-hosting.com:/home/cpanelUsername/subdomain.domain.com/.
You want to create a folder and a file in your project.github/workflows/upload.yml. Paste the content in the upload.yml file we just created.
SETTING UP ON GITHUB REPOSITORY
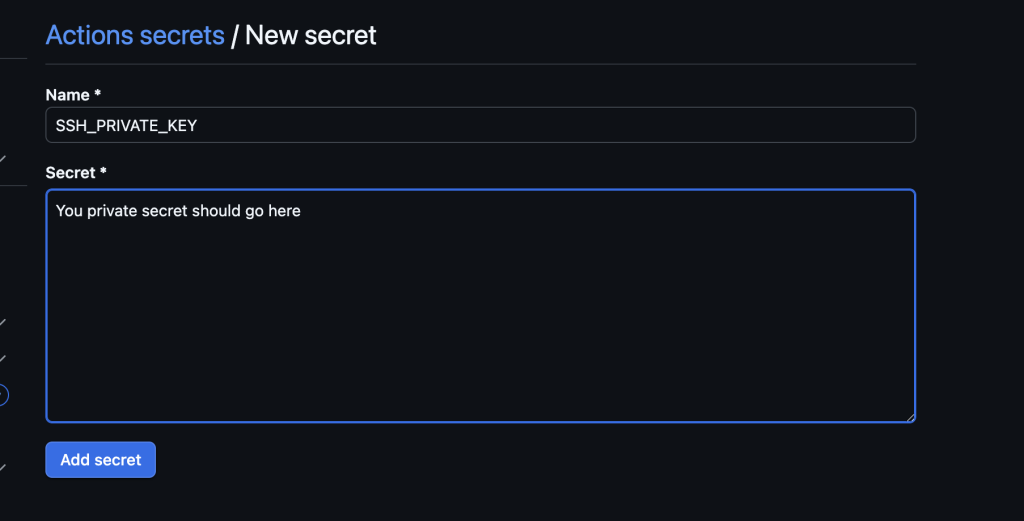
On github, from your project repository, navigate to settings -> secrets and variables -> actions

Add a secret with this name SSH_PRIVATE_KEY. In the value secret filed, we will paste our secret key there. After that, click on add secret
To see your secret key, run this command in your terminal:
cat ~/.ssh/github_deploy
cat
NB: Rember our ssh key was created with github_deploy as the name. You want to replace github_deploy with any name that you used.
Now commit your changes and push your code to github. There will be an indication (a yellow dot at the commit header of your project repo) about the progress of your deployment. You can click on that yellow dot to see more details about your deployment progress.
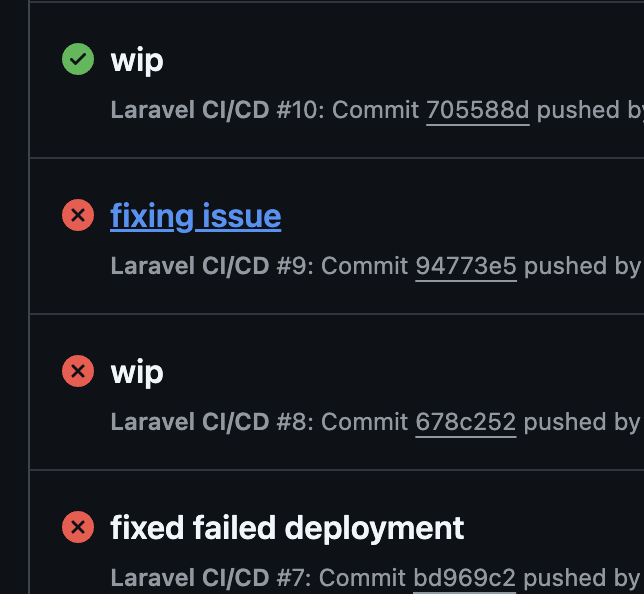
That’s it. Your deployment process should turn a green check on successful deployment.
If you do have any question, don’t hesitate to let me know.
Find me on X(Formerly Twitter ) : jovial_core
Also, you can checkout builderstreak.com a tool I built that is in it’s early stages if you want to document your building In public journey or what-company-stack 1.0 , an open source project we released in 2023.
If you don’t mind, there is a sponsorship button on my github profile 😊
Leave a Reply